 【Centos7.9】强力卸载脚本redhat7
# 🧩 一、代码实现思路
本脚本的目标是 自动化卸载 Ambari & Bigtop 组件,同时清理相关文件、目录、用户及数据库数据,确保集群环境完全清理干净,以便重新部署或释放资源。
# 🔹 1.1 主要功能
- 🚀 批量 SSH 连接:使用
sshpass避免手动输入密码,提高执行效率; - 📄 解析
hosts.txt:逐行读取集群节点的用户信息; - 🛠 远程执行:
- ❌ 停止相关进程
- 🧹 卸载
Ambari&Bigtop - 🗑️ 清理残留文件
- 👤 移除系统用户
- 💾 清理数据库
# 🔹 1.2 代码执行流程
graph TD;
    A[初始化] -->|检查 sshpass| B(检测 hosts.txt)
    B -->|读取主机| C{SSH 连接测试}
    C --失败--> D[记录到 failed_hosts.log]
    C --成功--> E[远程执行]
    E -->|停止进程| F
    E -->|卸载组件| G
    E -->|清理残留| H
    E -->|清理数据库| I
    F --> J[日志记录]
    G --> J
    H --> J
    I --> J
    J -->|全部完成| K[输出 log 并提示]
1
2
3
4
5
6
7
8
9
10
11
12
13
14
2
3
4
5
6
7
8
9
10
11
12
13
14
# 📝 二、关键代码解读
# 🔹 2.1 初始化
# 📌 检查 sshpass 是否安装
check_install_sshpass() {
  if ! command -v sshpass &>/dev/null; then
    echo "sshpass 未安装,开始安装..."
    if command -v yum &>/dev/null; then
      sudo yum install -y epel-release sshpass
    elif command -v apt &>/dev/null; then
      sudo apt update && sudo apt install -y sshpass
    else
      echo "未找到支持的包管理器,请手动安装 sshpass."
      exit 1
    fi
  fi
}
1
2
3
4
5
6
7
8
9
10
11
12
13
2
3
4
5
6
7
8
9
10
11
12
13
# 📌 日志记录
LOGFILE="script_debug.log"
exec > >(tee -a "$LOGFILE") 2>&1
1
2
2
# 🔹 2.2 读取 hosts.txt 并解析主机信息
# 📌 读取主机文件
HOSTS_FILE="./hosts.txt"

if [ ! -f "$HOSTS_FILE" ]; then
  echo "未找到主机文件 $HOSTS_FILE"
  exit 1
fi
1
2
3
4
5
6
2
3
4
5
6
# 📌 SSH 连接测试
check_ssh_connection() {
  local user="$1" ip="$2" password="$3"
  sshpass -p "$password" ssh -o StrictHostKeyChecking=no "$user@$ip" "exit" &>/dev/null
  return $?
}
1
2
3
4
5
2
3
4
5
- ✅ 连接成功 → 进入 远程卸载任务
- ❌ 连接失败 → 记录到
failed_hosts.log并跳过
# 🔹 2.3 远程停止 Ambari & Bigtop 相关进程
# 📌 停止关键进程
stop_process_by_keyword() {
  local keyword="$1"
  local pids
  pids=$(ps -ef | grep "$keyword" | grep -v "grep" | awk '{print $2}')
  if [ -n "$pids" ]; then
    kill -9 $pids || echo "部分进程停止失败."
  fi
}
1
2
3
4
5
6
7
8
2
3
4
5
6
7
8
# 📌 远程执行停止进程
sshpass -p "$password" ssh "$user@$ip" "bash -s" <<'EOF'
stop_process_by_keyword "java"
stop_process_by_keyword "n9e"
EOF
1
2
3
4
2
3
4
# 🔹 2.4 卸载 Ambari & Bigtop 组件
# 📌 远程卸载 Yum 组件
sshpass -p "$password" ssh "$user@$ip" "bash -s" <<'EOF'
packages=$(yum list installed | grep -E '(@BIGTOP|ambari)' | awk '{print $1}')
for package in $packages; do
  sudo yum remove -y "$package"
done
EOF
1
2
3
4
5
6
2
3
4
5
6
# 🔹 2.5 清理残留文件
# 📌 删除相关目录
sshpass -p "$password" ssh "$user@$ip" "bash -s" <<'EOF'
find / -name "*ambari*" -exec rm -rf {} \; 2>/dev/null
find /var /usr -name "bigtop*" -exec rm -rf {} \; 2>/dev/null
EOF
1
2
3
4
2
3
4
# 📌 移除相关用户
sshpass -p "$password" ssh "$user@$ip" "bash -s" <<'EOF'
USERS=(ambari-qa ams hbase hdfs hive kafka zookeeper)
for user in "${USERS[@]}"; do
  userdel -r "$user" 2>/dev/null || true
  groupdel "$user" 2>/dev/null || true
done
EOF
1
2
3
4
5
6
7
2
3
4
5
6
7
# 📊 三、执行日志的分析
# 🔹 3.1 日志示例
2022-12-05  17:30:47 [Info] 处理主机:192.168.3.1 (user: root)
2022-12-05  17:30:48 [Info] 成功连接主机 192.168.3.1 (user: root).
2022-12-05  17:30:48 [Info] SSH 连接成功,开始执行远程服务停止及清理操作...
Warning: Permanently added '192.168.3.1' (ECDSA) to the list of known hosts.
2022-12-05  17:30:48 [Info] 开始停止服务...
2022-12-05  17:30:48 [Info] 停止 JPS 列出的进程...
bash:行15: jps: 未找到命令
2022-12-05  17:30:48 [Info] 未检测到相关进程.
2022-12-05  17:30:48 [Info] 停止匹配关键词 [java] 的进程...
2022-12-05  17:30:48 [Info] 未检测到匹配 [java] 的进程.
2022-12-05  17:30:48 [Info] 停止匹配关键词 [n9e] 的进程...
2022-12-05  17:30:48 [Info] 未检测到匹配 [n9e] 的进程.
2022-12-05  17:30:48 [Info] 停止匹配关键词 [nightingale] 的进程...
2022-12-05  17:30:48 [Info] 未检测到匹配 [nightingale] 的进程.
2022-12-05  17:30:48 [Info] 停止匹配关键词 [categraf] 的进程...
2022-12-05  17:30:48 [Info] 未检测到匹配 [categraf] 的进程.
2022-12-05  17:30:48 [Info] 卸载 BIGTOP 与 Ambari 相关软件包...
2022-12-05  17:30:49 [Info] 服务停止操作完成.
Warning: Permanently added '192.168.3.1' (ECDSA) to the list of known hosts.
2022-12-05  17:30:49 [Info] 开始执行清理操作...
2022-12-05  17:30:49 [Info] 清理匹配关键词的文件和目录...
2022-12-05  17:30:49 [Info] 清理匹配关键词 [ambari-qa] 的文件...
2022-12-05  17:30:50 [Info] 清理匹配关键词 [ams] 的文件...
2022-12-05  17:30:51 [Info] 清理匹配关键词 [hbase] 的文件...
2022-12-05  17:30:52 [Info] 清理匹配关键词 [hcat] 的文件...
2022-12-05  17:30:53 [Info] 清理匹配关键词 [hdfs] 的文件...
2022-12-05  17:30:54 [Info] 清理匹配关键词 [hive] 的文件...
2022-12-05  17:30:56 [Info] 清理匹配关键词 [kafka] 的文件...
2022-12-05  17:30:57 [Info] 清理匹配关键词 [kms] 的文件...
2022-12-05  17:30:58 [Info] 清理匹配关键词 [mapred] 的文件...
2022-12-05  17:30:59 [Info] 清理匹配关键词 [ranger] 的文件...
2022-12-05  17:31:00 [Info] 清理匹配关键词 [solr] 的文件...
2022-12-05  17:31:01 [Info] 清理匹配关键词 [sqoop] 的文件...
2022-12-05  17:31:02 [Info] 清理匹配关键词 [tez] 的文件...
2022-12-05  17:31:03 [Info] 清理匹配关键词 [yarn] 的文件...
2022-12-05  17:31:04 [Info] 清理匹配关键词 [dolphin] 的文件...
2022-12-05  17:31:05 [Info] 清理匹配关键词 [zookeeper] 的文件...
2022-12-05  17:31:06 [Info] 清理匹配关键词 [doris] 的文件...
2022-12-05  17:31:07 [Info] 清理匹配关键词 [nightingale] 的文件...
2022-12-05  17:31:08 [Info] 清理匹配关键词 [categraf] 的文件...
2022-12-05  17:31:09 [Info] 清理匹配关键词 [spark] 的文件...
2022-12-05  17:31:10 [Info] 清理匹配关键词 [flink] 的文件...
2022-12-05  17:31:11 [Info] 清理匹配关键词 [zeppelin] 的文件...
2022-12-05  17:31:12 [Info] 清理匹配关键词 [phoenix] 的文件...
2022-12-05  17:31:13 [Info] 清理匹配关键词 [ozone] 的文件...
2022-12-05  17:31:14 [Info] 清理匹配关键词 [celeborn] 的文件...
2022-12-05  17:31:15 [Info] 清理匹配关键词 [cloudbeaver] 的文件...
2022-12-05  17:31:16 [Info] 清理特定路径下的 'ambari*' 文件...
2022-12-05  17:31:16 [Info] 清理 BIGTOP 残留文件...
2022-12-05  17:31:17 [Info] 清理用户及用户组...
2022-12-05  17:31:17 [Info] 清理用户家目录...
2022-12-05  17:31:17 [Info] 清理 Kafka 元数据及其他目录...
2022-12-05  17:31:17 [Info] 清理 MySQL 数据...
Installing MariaDB/MySQL system tables in '/var/lib/mysql' ...
OK

To start mariadbd at boot time you have to copy
support-files/mariadb.service to the right place for your system


Two all-privilege accounts were created.
One is root@localhost, it has no password, but you need to
be system 'root' user to connect. Use, for example, sudo mysql
The second is mysql@localhost, it has no password either, but
you need to be the system 'mysql' user to connect.
After connecting you can set the password, if you would need to be
able to connect as any of these users with a password and without sudo

See the MariaDB Knowledgebase at https://mariadb.com/kb

You can start the MariaDB daemon with:
cd '/usr' ; /usr/bin/mariadbd-safe --datadir='/var/lib/mysql'

You can test the MariaDB daemon with mysql-test-run.pl
cd '/usr/share/mysql-test' ; perl mariadb-test-run.pl

Please report any problems at https://mariadb.org/jira

The latest information about MariaDB is available at https://mariadb.org/.

Consider joining MariaDB's strong and vibrant community:
https://mariadb.org/get-involved/

2022-12-05  17:31:19 [Info] 清理 Hadoop 日志目录...
2022-12-05  17:31:19 [Info] 重新配置 locale...
2022-12-05  17:31:21 [Info] 清理操作完成.
2022-12-05  17:31:21 [Info] 主机 192.168.3.1 操作完成.
1
2
3
4
5
6
7
8
9
10
11
12
13
14
15
16
17
18
19
20
21
22
23
24
25
26
27
28
29
30
31
32
33
34
35
36
37
38
39
40
41
42
43
44
45
46
47
48
49
50
51
52
53
54
55
56
57
58
59
60
61
62
63
64
65
66
67
68
69
70
71
72
73
74
75
76
77
78
79
80
81
82
83
84
85
86
87
88
89
2
3
4
5
6
7
8
9
10
11
12
13
14
15
16
17
18
19
20
21
22
23
24
25
26
27
28
29
30
31
32
33
34
35
36
37
38
39
40
41
42
43
44
45
46
47
48
49
50
51
52
53
54
55
56
57
58
59
60
61
62
63
64
65
66
67
68
69
70
71
72
73
74
75
76
77
78
79
80
81
82
83
84
85
86
87
88
89
执行yum卸载数据源安装的组件

# 📥 四、快速卸载 🚀
⚠️ 重要提醒
本脚本会删除所有已安装的大数据组件,并清空相关数据目录。
💀 请务必确认不再需要这些数据后再执行操作!
# 🔹 4.1 获取卸载脚本
请先前往 微信公众号 获取 卸载脚本的下载链接 📎,然后将文件下载到您的服务器。
# 📌 公众号获取下载链接示例 
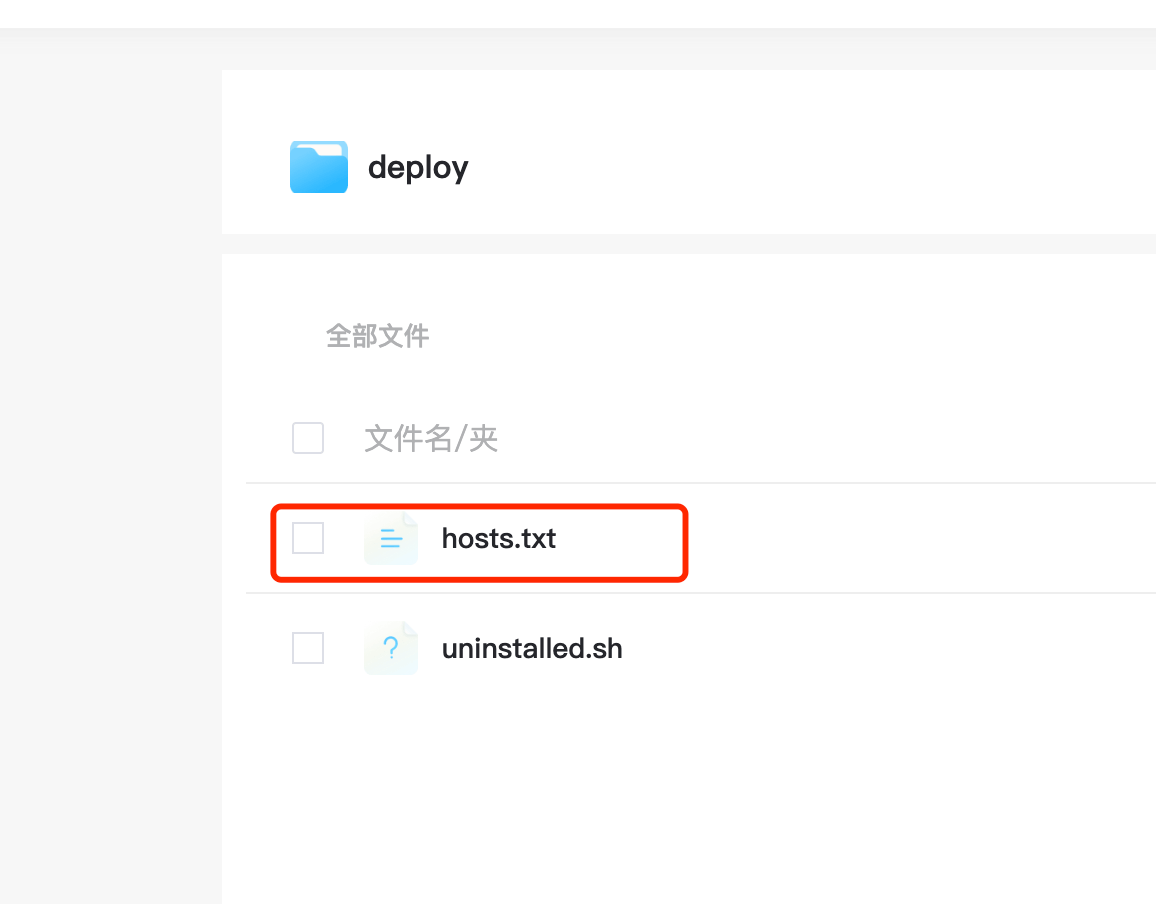
# 🔹 4.2 配置 hosts.txt
在解压后的目录中,找到 hosts.txt 文件,并按照以下格式填写 需要卸载的集群节点信息:
**📌 格式说明**
<用户名> <密码> <IP地址>
1
✅ 示例
root Tt3832514048 192.168.3.1
root Tt3832514048 192.168.3.2
root Tt3832514048 192.168.3.3
1
2
3
2
3
📌 注意事项
- 不同机器信息换行填写
- 确保密码正确,IP 地址可达
- 此文件必须和卸载脚本在同一目录
📌 示例文件截图

# 🔹 4.3 运行卸载脚本
在 hosts.txt 配置完成后,执行以下命令运行卸载脚本,系统将自动解析 hosts.txt 文件,并在各节点上执行 卸载任务。
bash uninstall.sh
1
📌 脚本执行过程
✅ 脚本功能
- 解析
hosts.txt文件 - 连接所有集群节点
- 卸载 Ambari、Hadoop 及相关组件
- 清理数据目录,释放磁盘空间
📌 执行过程示例
# 🔹4.4 风险提示
⚠️ 高风险操作
本脚本会永久删除以下数据,无法恢复:
- HDFS 存储数据
- Zookeeper 配置
- Hive 元数据
- YARN 任务管理信息
- 系统环境变量中与大数据相关的配置
📌 如果你只是想重装某些组件,建议手动卸载相关服务,而不是执行完整卸载脚本。