 Step5—Nginx 本地 Yum 文件服务
# Step5—Nginx 本地 Yum 文件服务
Ambari Plus 安装包已经放在 /data/modules,但其他节点不能直接读核心节点的本地目录。这里要做一层 Nginx 文件服务,把这个目录通过 HTTP 暴露出去。后面 RHEL 系写 .repo、Ubuntu 写本地 APT 源,都会指向这个地址。
本文约定:
| 项目 | 值 |
|---|---|
| 核心节点 | hadoop1.test.com |
| 仓库目录 | /data/modules |
| HTTP 地址 | http://hadoop1.test.com/ |
# 安装 Nginx
只在核心节点 hadoop1.test.com 安装。
sudo dnf -y install nginx || sudo yum -y install nginx
sudo systemctl enable --now nginx
1
2
2
sudo apt update
sudo apt install -y nginx
sudo systemctl enable --now nginx
1
2
3
2
3
// Make sure to add code blocks to your code group
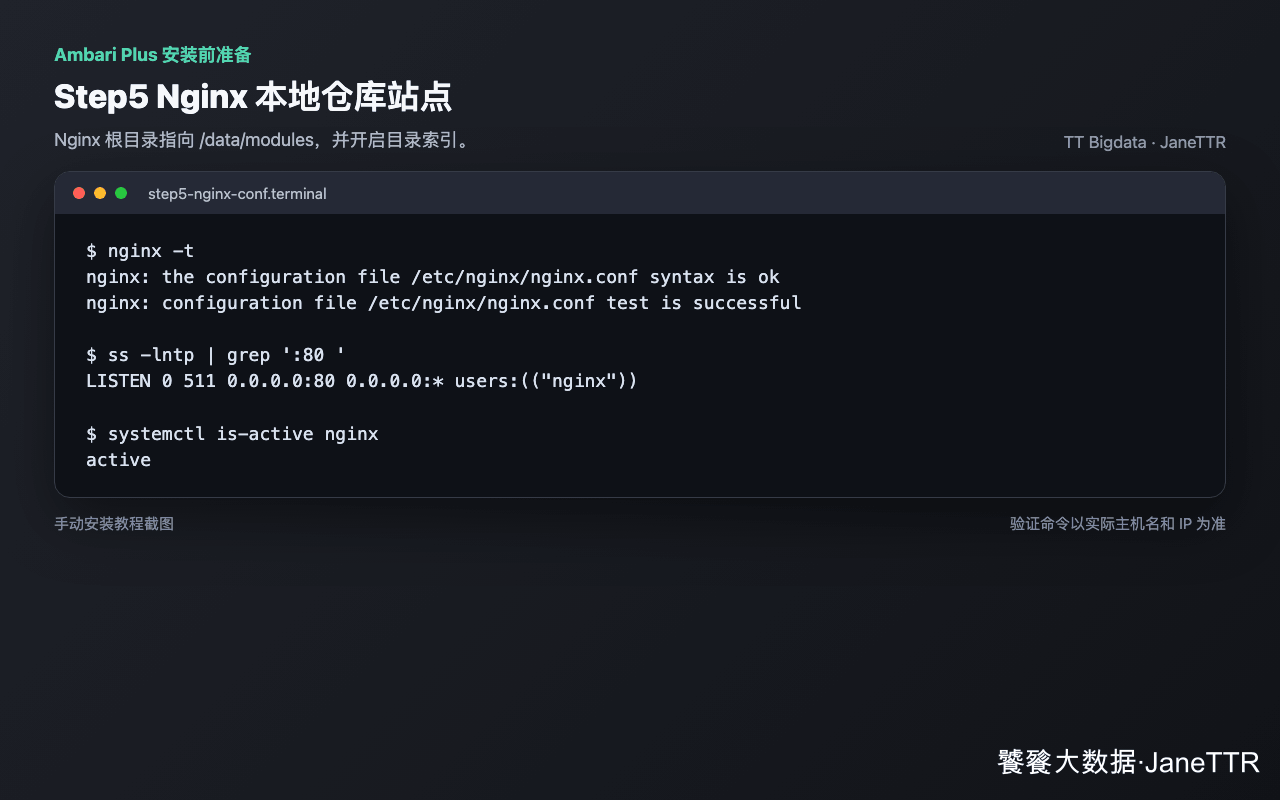
检查服务:
systemctl is-active nginx
1
# 准备目录权限
Nginx 要能读取 /data/modules:
sudo mkdir -p /data/modules
sudo chmod -R 755 /data/modules
1
2
2
RHEL 系如果开启 SELinux,还要处理上下文。临时验证可以用 chcon,正式环境建议写成持久规则:
getenforce

sudo semanage fcontext -a -t httpd_sys_content_t '/data/modules(/.*)?'
sudo restorecon -Rv /data/modules
1
2
3
4
2
3
4
如果系统没有 semanage,先安装:
sudo dnf -y install policycoreutils-python-utils || \
sudo yum -y install policycoreutils-python-utils
1
2
2
如果 getenforce 显示 Disabled,可以跳过这一段。
# 写入站点配置
在核心节点创建 Nginx 配置:
sudo tee /etc/nginx/conf.d/ambari-plus-repo.conf >/dev/null <<'EOF'
server {
    listen 80;
    server_name hadoop1.test.com 192.168.3.101 localhost;

    root /data/modules;
    index index.html index.htm;

    location / {
        allow 192.168.3.0/24;
        allow 127.0.0.1;
        deny all;

        autoindex on;
        autoindex_exact_size off;
        autoindex_localtime on;
        try_files $uri $uri/ =404;
    }

    types {
        application/xml xml;
        application/x-rpm rpm;
        text/plain repomd;
    }
}
EOF
1
2
3
4
5
6
7
8
9
10
11
12
13
14
15
16
17
18
19
20
21
22
23
24
25
26
2
3
4
5
6
7
8
9
10
11
12
13
14
15
16
17
18
19
20
21
22
23
24
25
26
这里的 server_name 和 allow 192.168.3.0/24 按你的核心节点主机名、IP 和集群网段修改。root /data/modules 不要写错,否则后面仓库地址能打开,但找不到包。
# 测试并启动
sudo nginx -t
sudo systemctl restart nginx
sudo systemctl enable nginx
1
2
3
2
3
# 放通 HTTP 端口
如果启用了防火墙:
sudo firewall-cmd --add-service=http --permanent
sudo firewall-cmd --reload
1
2
2
sudo ufw allow 80/tcp
sudo ufw reload
1
2
2
// Make sure to add code blocks to your code group
云主机还要检查安全组是否允许工作节点访问核心节点 80 端口。
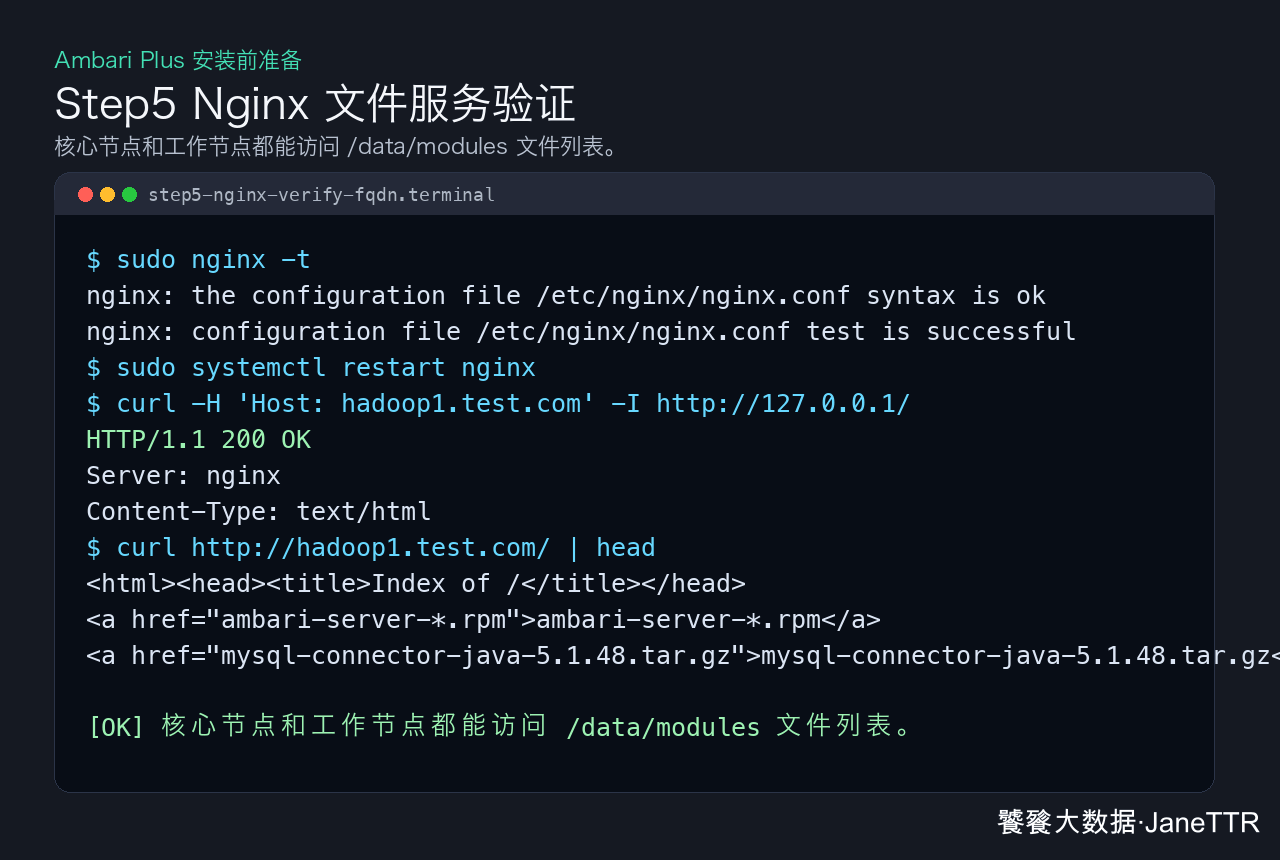
# 先做目录访问验证
在核心节点执行:
curl -H 'Host: hadoop1.test.com' -I http://127.0.0.1/
curl -H 'Host: hadoop1.test.com' http://127.0.0.1/ | head
1
2
2
在工作节点执行:
curl -I http://hadoop1.test.com/
curl http://hadoop1.test.com/ | head
1
2
2
如果返回 200 OK 或能看到目录索引,说明 Nginx 文件服务已经通了。
访问范围
这里打开了 autoindex,读者可以直接看到 /data/modules 下的包名。实验环境问题不大,生产内网我建议至少保留上面的 allow/deny,并配合防火墙或安全组只允许集群网段访问。
# 常见问题
| 现象 | 原因 | 处理 |
|---|---|---|
nginx -t 失败 | 配置语法错误 | 检查大括号、分号和 try_files |
| 本机能访问,工作节点不能访问 | 防火墙或安全组未放通 | 放通 80/tcp |
| 403 Forbidden | Nginx 没有目录权限、SELinux 拦截或不在允许网段 | 检查权限、restorecon 和 allow 网段 |
| 404 Not Found | root 目录写错 | 确认配置指向 /data/modules |
本机 127.0.0.1 访问到默认页 | 命中了默认站点 | 用 curl -H 'Host: hadoop1.test.com' http://127.0.0.1/ 验证 |
Nginx 通过后,核心节点就具备了本地文件服务能力,下一步准备 JDK 双环境。