 Step1—系统源与基础工具准备
# Step1—系统源与基础工具准备
Step0 准备的是资源包和 /data/modules 目录,Step1 开始检查操作系统本身。这里不初始化 Chrony、不配置 Nginx 站点、不初始化 MariaDB;这些分别放在 Step4、Step5、Step8。本文只做一件事:让每台机器具备后续安装所需的基础命令和可用软件源。
我会按下面这个范围来做:
| 节点 | 本步骤要完成什么 |
|---|---|
hadoop1.test.com | 系统源可用,基础工具、SSH 服务、仓库工具可用 |
hadoop2.test.com / hadoop3.test.com | 系统源可用,基础工具、SSH 服务、时间同步客户端工具可用 |
注意
不要在生产机器上直接清空 /etc/yum.repos.d/ 或覆盖 /etc/apt/sources.list。如果系统已有公司内网源、云厂商源或安全加固源,先备份,再按实际情况新增一个独立源文件。
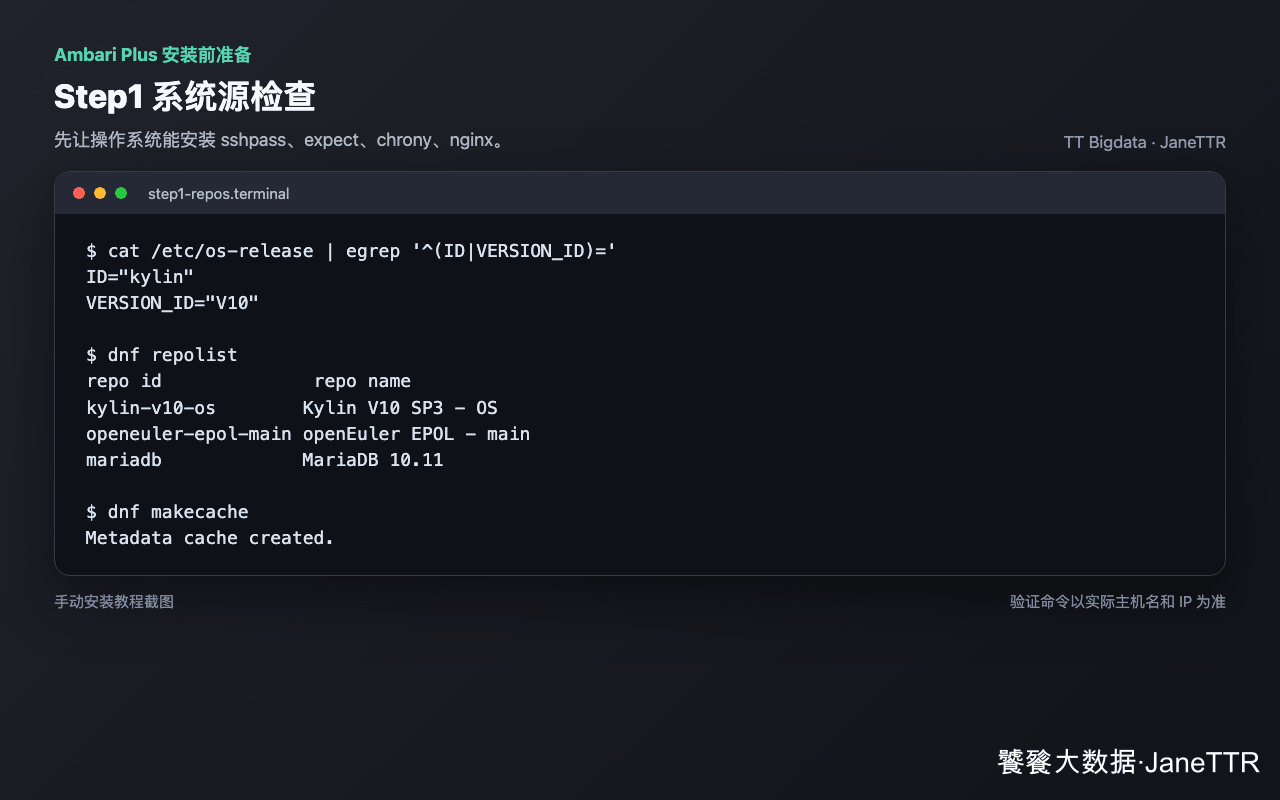
# 检查系统版本和架构
所有节点执行:
cat /etc/os-release
uname -m
2
三台机器最好使用同一类系统和同一架构。例如都使用 x86_64,或者都使用 aarch64。如果混用架构,后续 /data/modules 就要同时维护多套包,新手不建议这样做。
# 配置系统源
如果当前机器已经能正常安装软件包,可以跳过改源,只做 makecache 或 apt update。如果需要切换到国内镜像,建议新建独立文件。
sudo cp -a /etc/yum.repos.d /etc/yum.repos.d.bak.$(date +%F-%H%M%S)

sudo tee /etc/yum.repos.d/rocky8-aliyun.repo >/dev/null <<'EOF'
[rocky-baseos]
name=Rocky Linux 8 - BaseOS
baseurl=https://mirrors.aliyun.com/rockylinux/8/BaseOS/$basearch/os/
enabled=1
gpgcheck=1
gpgkey=https://mirrors.aliyun.com/rockylinux/RPM-GPG-KEY-rockyofficial

[rocky-appstream]
name=Rocky Linux 8 - AppStream
baseurl=https://mirrors.aliyun.com/rockylinux/8/AppStream/$basearch/os/
enabled=1
gpgcheck=1
gpgkey=https://mirrors.aliyun.com/rockylinux/RPM-GPG-KEY-rockyofficial

[rocky-extras]
name=Rocky Linux 8 - Extras
baseurl=https://mirrors.aliyun.com/rockylinux/8/extras/$basearch/os/
enabled=1
gpgcheck=1
gpgkey=https://mirrors.aliyun.com/rockylinux/RPM-GPG-KEY-rockyofficial
EOF

sudo dnf clean all
sudo dnf makecache
2
3
4
5
6
7
8
9
10
11
12
13
14
15
16
17
18
19
20
21
22
23
24
25
26
27
# Kylin V10、RHEL、AlmaLinux 等不要直接照抄 Rocky 源。
# 先确认 /etc/os-release,再使用厂商源、公司内网源或已验证镜像源。
cat /etc/os-release

# 已有可用源时,只刷新缓存即可:
sudo dnf makecache || sudo yum makecache
2
3
4
5
6
sudo cp /etc/apt/sources.list /etc/apt/sources.list.bak.$(date +%F-%H%M%S)

sudo tee /etc/apt/sources.list.d/aliyun-jammy.list >/dev/null <<'EOF'
deb https://mirrors.aliyun.com/ubuntu/ jammy main restricted universe multiverse
deb https://mirrors.aliyun.com/ubuntu/ jammy-updates main restricted universe multiverse
deb https://mirrors.aliyun.com/ubuntu/ jammy-security main restricted universe multiverse
deb https://mirrors.aliyun.com/ubuntu/ jammy-backports main restricted universe multiverse
EOF

sudo apt update
2
3
4
5
6
7
8
9
10
// Make sure to add code blocks to your code group
提示
公网源适合实验环境。生产环境更推荐 Nexus、Artifactory、aptly、reposync 等内网源,并保留包签名校验。
# 安装基础工具
所有节点都安装下面这组工具。安装时不要加 --skip-broken,否则缺包问题会被跳过去,后面再排查会更麻烦;失败就停下来修系统源。
sudo dnf -y install \
  wget curl vim tar unzip which sudo less lsof rsync \
  net-tools iproute iputils hostname passwd \
  openssh-server openssh-clients \
  procps-ng make cmake autoconf automake libtool m4 pkgconf \
  chrony sshpass expect python3 socat perl-DBI \
  gcc gcc-c++ \
  createrepo_c || \
sudo yum -y install \
  wget curl vim tar unzip which sudo less lsof rsync \
  net-tools iproute iputils hostname passwd \
  openssh-server openssh-clients \
  procps-ng make cmake autoconf automake libtool m4 pkgconf \
  chrony sshpass expect python3 socat perl-DBI \
  gcc gcc-c++ \
  createrepo

sudo systemctl enable --now sshd
2
3
4
5
6
7
8
9
10
11
12
13
14
15
16
17
18
sudo apt update
sudo apt install -y \
  wget curl vim tar unzip sudo less lsof rsync \
  net-tools iproute2 iputils-ping hostname passwd \
  openssh-server openssh-client \
  procps make cmake autoconf automake libtool m4 pkgconf \
  chrony sshpass expect python3 dpkg-dev \
  gcc g++ socat

sudo systemctl enable --now ssh
2
3
4
5
6
7
8
9
10
// Make sure to add code blocks to your code group
# 核心节点预装可选服务包
如果你希望后续步骤更顺,可以在核心节点预装 Nginx 和 MariaDB 包;也可以等 Step5、Step8 再装。这里不写任何站点配置,也不初始化数据库。
# 仅在 hadoop1.test.com 执行
sudo dnf -y install nginx || sudo yum -y install nginx
sudo systemctl enable --now nginx

# MariaDB 也可以等 Step8 再安装
2
3
4
5
# 仅在 hadoop1.test.com 执行
sudo apt update
sudo apt install -y nginx
sudo systemctl enable --now nginx

# MariaDB 也可以等 Step8 再安装
2
3
4
5
6
// Make sure to add code blocks to your code group
笔记
此处只确认 Nginx 服务能启动。/data/modules 文件服务、目录索引和访问控制会在 Step5 配置。
# MariaDB 客户端准备
工作节点后面要验证远程数据库连接,建议至少安装 MariaDB 客户端。
# hadoop2.test.com / hadoop3.test.com 执行
sudo dnf -y install MariaDB-client || sudo yum -y install MariaDB-client || sudo yum -y install mariadb
2
# hadoop2.test.com / hadoop3.test.com 执行
sudo apt update
sudo apt install -y mariadb-client
2
3
// Make sure to add code blocks to your code group
如果 RHEL 系没有 MariaDB-client,先不要硬改系统库,等 Step8 配置 MariaDB 官方源后再安装客户端。
# 可选:PostgreSQL 基础服务
只有明确需要 PostgreSQL 的目标节点才执行这一段,不要三台机器全部照抄。
sudo dnf -y install postgresql-server postgresql-contrib || sudo yum -y install postgresql-server postgresql-contrib

if command -v postgresql-setup >/dev/null 2>&1; then
  sudo postgresql-setup --initdb
fi

sudo systemctl enable --now postgresql
2
3
4
5
6
7
sudo apt update
sudo apt install -y postgresql postgresql-contrib
sudo systemctl enable --now postgresql
2
3
// Make sure to add code blocks to your code group
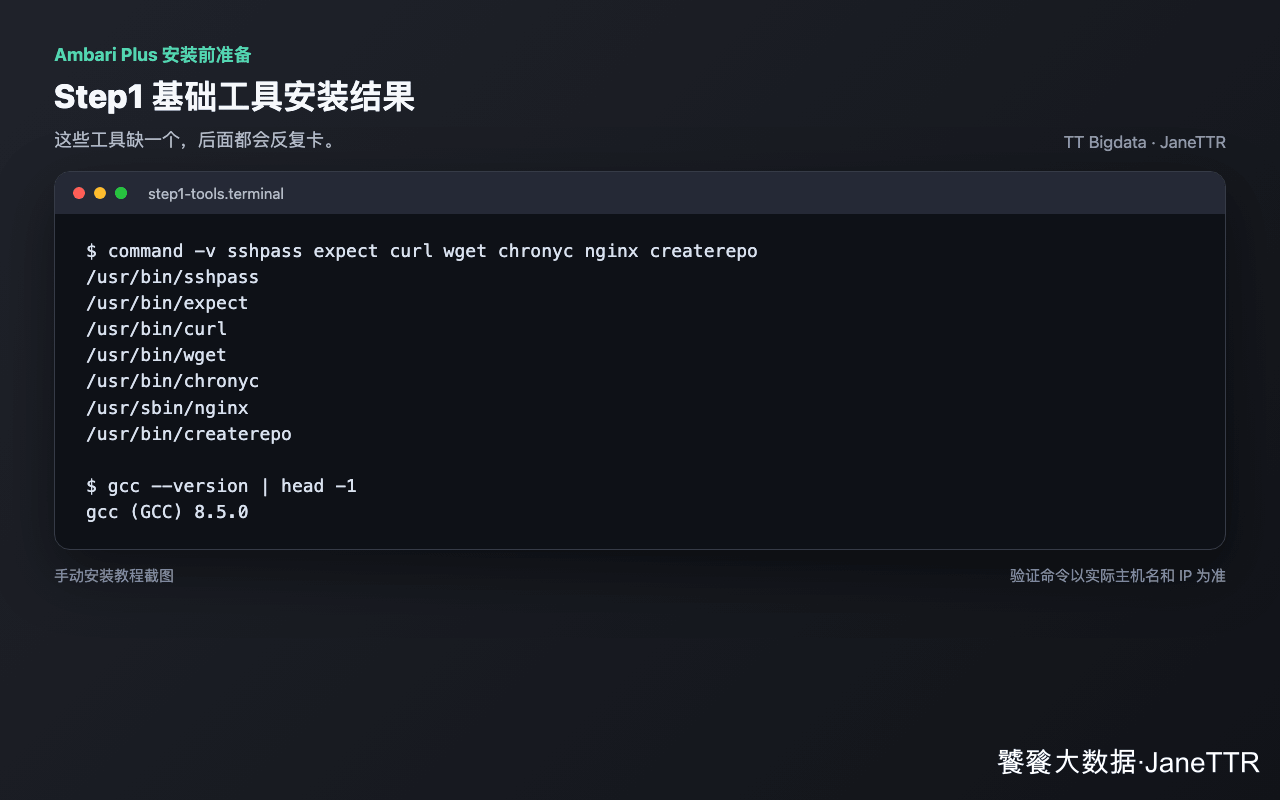
# 完成标准
所有节点检查:
command -v sshpass
command -v expect
command -v curl
command -v wget
command -v chronyc
systemctl is-active sshd 2>/dev/null || systemctl is-active ssh
2
3
4
5
6
核心节点额外检查:
command -v nginx || true
command -v createrepo_c || command -v createrepo || command -v dpkg-scanpackages
2
这些命令通过后,再进入 Step2 做 SSH 免密登录。